Tables
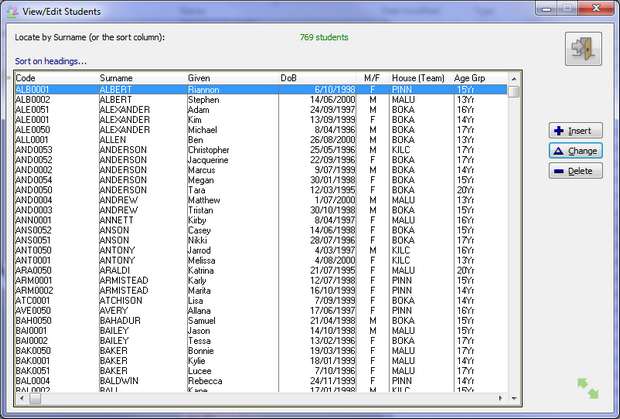
Data is generally displayed in scrollable tables referred to as Browse Tables.

A typical table - the student list
The table generally allows you to find and view data without changing it.
The update buttons (Insert, Change, Delete) call up a Form, where data is changed.
Navigate through the table with the scroll bar (right hand side of table), Up and Down Arrows, or <PgUp> <PgDn> keys.
Where tables offer Sort Headers, you can sort on one or more columns in forward or reverse order.
on the column heading to sort the table on that column
Mouse Action |
Behaviour |
<CLICK> on column heading |
Sort the table on that column |
<CLICK> again on same heading |
Reverse Sort |
<CTRL-CLICK> on another header |
Include that column in the sort order. |
<SHIFT-Click> on a header |
Clear the sort and set the table back to standard. |
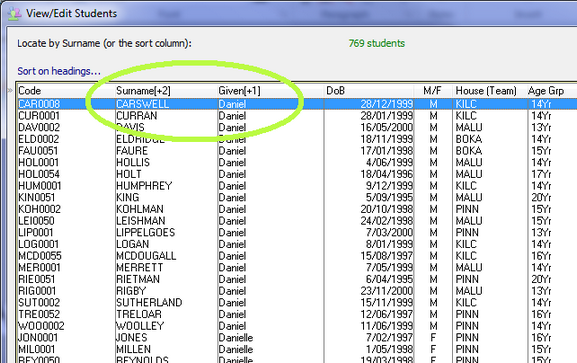
In this screen shot, I have clicked on Given then on Surname.
Students are then grouped by their Given names in Surname order. |
 Sorted on Given, then Surname |
Indicated by a prompt such as Locate on Surname or Locate on Sort Column
Click on the table (so Windows knows what part of the window you are on).
Start typing a surname eg CAR and the table will scroll automatically to the nearest matching surname.
If you have sorted the table then the locator works on the sort column, not surname.
So if you had sorted on Given you could start typing JAC and the table scrolls to Jacquelene. |
|
Clearing a Locator
<UP Arrow> or <DOWN Arrow>
To Locate again, you must clear the locator. This means clearing what you have just typed. You can Backspace the letters away and start again, or touch the Up or Down Arrow key which is easiest.